I jumped on the trendy and simply decorated cotton baker's twine bandwagon, and finally bought my own spool. I've started to include it in my packaging and really like the nice, little touch it adds. Since I use it so often, I keep it handy, but on its own, it gets knocked over, the twine come unraveled, and it isn't fitting in with the organized flow of everything else in my workspace. Etsy's blog recently ran an article on antique string dispensers and my first problem-solving thoughts jumped to buying some fun, vintage artifact that was made to do just what I needed it to do. I browsed and was quickly discouraged by the selections, the prices, and the fact that many of them were either best mounted on a wall or required the spool to be unwound first.
I stared intently at the spool and suddenly, creative inspiration high-fived thriftiness, and I had my solution. I grabbed the materials and headed to the work bench. No more than three minutes later, I had my twine holder. Sweet!
Obviously it's not very complicated, and I wouldn't have thought to post a tutorial, but I couldn't find anything like that in my quick Google search, and I thought of a neat little tip on the fly that I think is worth sharing. So here is how you can make one for yourself, you twine-loving crafty person you!
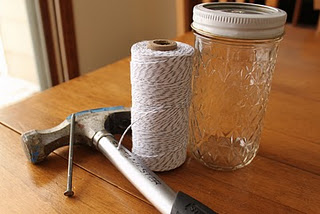
Start with these few simple elements: Your spool of twine (mine is a 240 yd spool of the popular Divine Twine), a jelly jar that the spool fits into (I found this tall, quilted jar fit perfectly, but many medium-sized jars would work too), a hammer and I relatively large gauge/ thick nail.
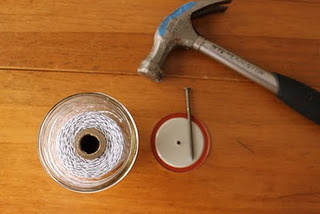
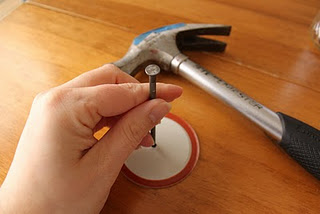
I imagine this would work with a single piece lid, but it worked very well with a 2-piece. Set the nail into the center of the inside of the flat part of the lid (on the workbench or some other surface that can handle a nail driven into it -- NOT on your dining room table!).
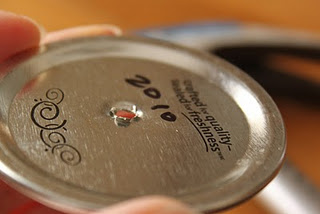
 Once the nail fit through the opening, I took it out and flipped the lid over. Here's where the genius really kicked in. I put the nail back through the hole in the lid so that that head of the nail rested on the sharp edges of the hole opening. Then I positioned the lid on the workbench so that the nail hung over the edge. A quick rap or two with the hammer on the head of the nail, and I flattened those sharp edges.
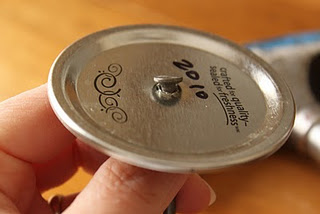
So now, I had a smooth, snag-less opening on the inside of the lid:
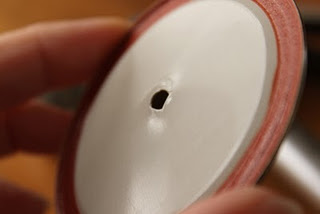
And a relatively ouch-less opening on the outside of the lid. I patted myself on the back for that one.
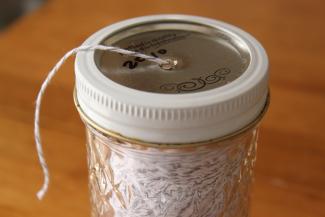
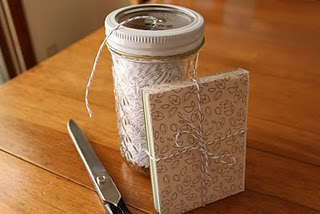
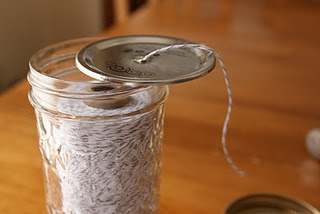
Then, I just put the spool in the jar, threaded the twine through the opening and the lid ring, screwed on the lid and Presto! Twine Holder. It fits the spool like they were made together, it's weighty enough to stay in place when I pull on the twine from the top, it's pretty darn cute, it didn't cost me a cent, and it's crafty as all get out.
I suppose an uber-crafter could go to town decorating the jar and/or the jar's lid with all sorts of craftiness, but I'm happy with this simple, re-purposed gem, and my hubby is glad that I didn't buy anything else. :)

Comments8
What a nifty idea! Thanks! :D
Your teaching is very useful and fantastic
This is great!
Loved the tutorial!
excellent photo tute, m'dear! and i love the little edge-smoothing trick, genius! also, i'm jealous that you have some divine twine.
could use a grommet on top too for snag prevention. nice idea I always hold on to pretty jelly jars
Thank you all for the nice comments! @poppy -- a grommet would be genius. I may just mod mine with this idea.
That is SUCH a good idea, thank you for sharing it and posting a how-to! Sometimes the best ideas are the most simple ones. And I like how you said not to do it on your dining table - even crafters need those reminders sometimes!
clever girl! This works really well with yarn balls and oatmeal cans (especially handy if you knit or crochet and have cats or lhasa apso pups :)Pam